
Here at STREAM for No Kid Hungry, we are dedicated to making sure you’re set up for success. One of the ways we want to do that is by providing you with information about streaming. In this blog, we’re going to cover Tiltify and how easy it is to start fundraising for No Kid Hungry.
As 1 in 6 kids are at risk of living with hunger in the US, our streaming community plays an essential role in making sure kids get the food they need to thrive. Tiltify is a great platform that will help you join our community of streamers, including Ludwig, Felicia Day, and Castro1021, who have raised over $4.6 Million dollars to support hungry kids.
Tiltify is a fantastic tool for fundraising and gets the job done. Once you get signed up with an account, your information squared away and a campaign started, you can begin fundraising!
It doesn’t stop there though. You can also get the Tiltify Twitch extension, create your own overlay for your streams and utilize their integrations. All this may seem a bit daunting at first, so we’re here to lead you through it.
Getting Started
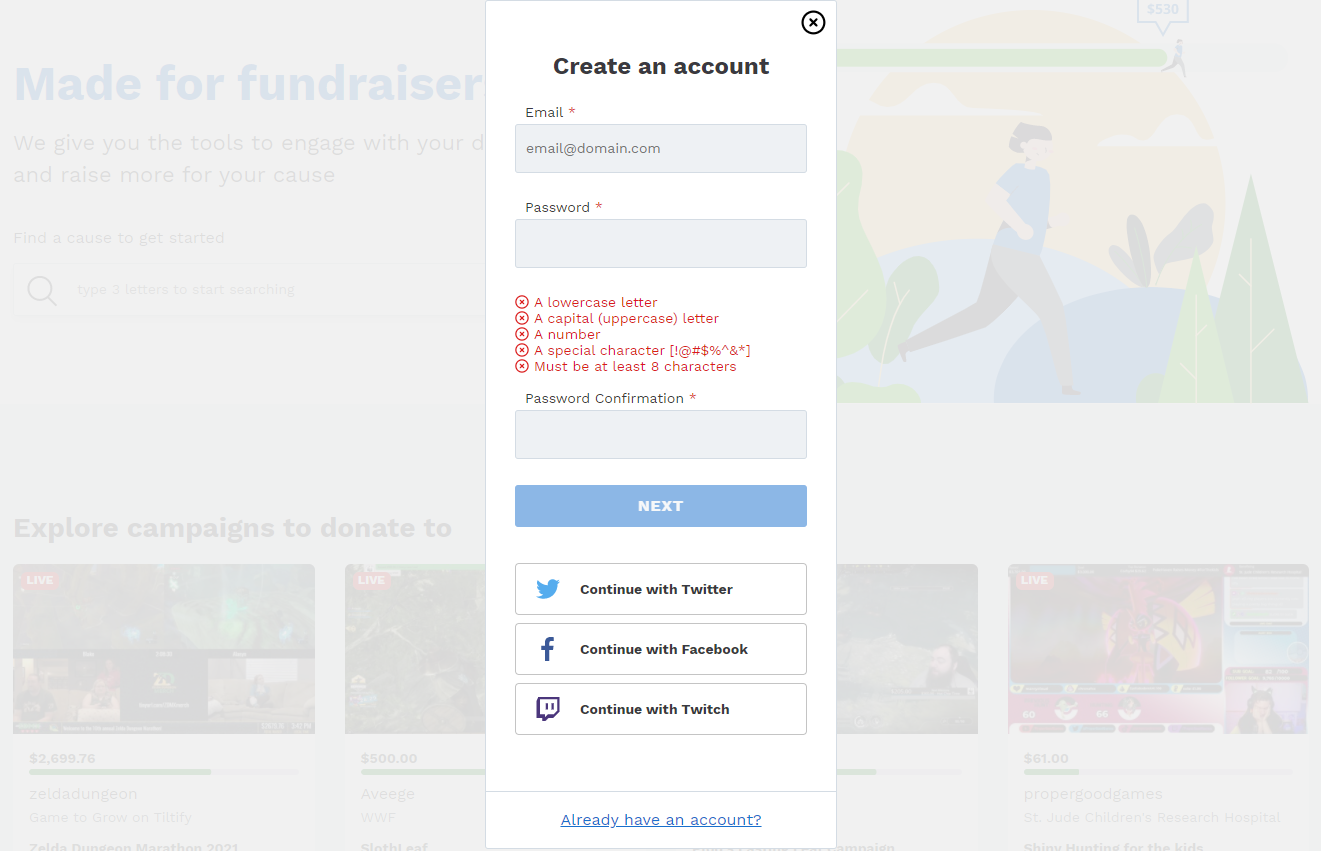
To get set up with your Tiltify account, first you’ll need to make one. You can either create a login or sign in with Twitter, Facebook or Twitch. We recommend signing up with Twitch if that is the platform you’ll be streaming on for fundraising. Pairing your Twitch to Tiltify now means you can skip linking them later!
Once you’re past the signup phase, hit your icon in the upper right corner(1) to get to the dashboard. Here is where you’ll navigate most of Tiltify.

Swing on by “My account”(2) to make sure all your personal information is squared away including your address, so you don’t have to put that in later for campaigns. Now that all the serious stuff is out of the way, go back to your dashboard and navigate to “Public profile”(3). Go ahead and input your bio and icon here so people recognize you on your campaigns then scroll down to “Social links.” Entering your links here makes them appear on your profile and aids promotion.
Now that you’re all good to go on the account front, let’s create a campaign!
Creating a Campaign
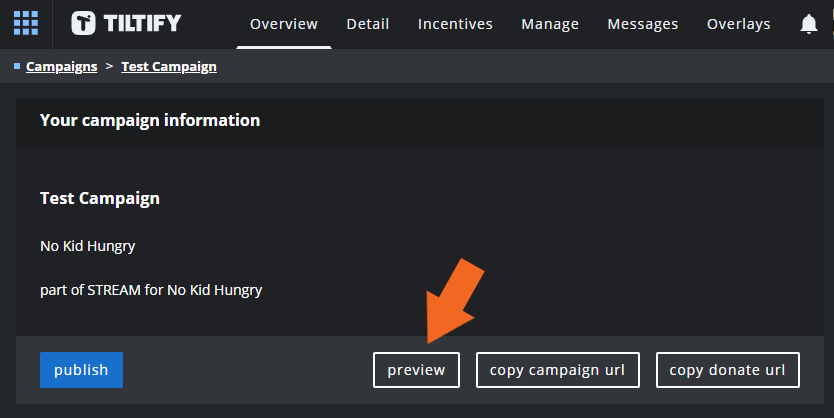
From your dashboard, hit the big button that says “create new individual campaign” to be taken to the cause page. Type in and select No Kid Hungry from the drop-down menu and follow the prompts!

Once your campaign is created, you can set up rewards, timed targets, polls for donors to vote with their donations, milestones to your goal and a schedule. You can also decide if you want to attach your livestream, a campaign image or a Youtube video to the campaign page.
Tip: Think you’re ready to publish? Double check everything is correct by clicking the “preview” button before you go live.
Implementing the Extension
Tiltify has a Twitch extension for you to utilize so donors don’t have to leave your stream to donate. Go into the extensions menu on Twitch, search and select Tiltify, hit install, configure by logging in and selecting that shiny new campaign you just made, and activate the extension by assigning it to a panel. Voila! Now a condensed version of your campaign page is on your Twitch page next to your other panels.
Overlays and Integrations
There are quite a few integrations you can configure, including StreamElements, Streamlabs and Rainjar; however, we would like to highlight Tiltify’s awesome build-in overlay tool.
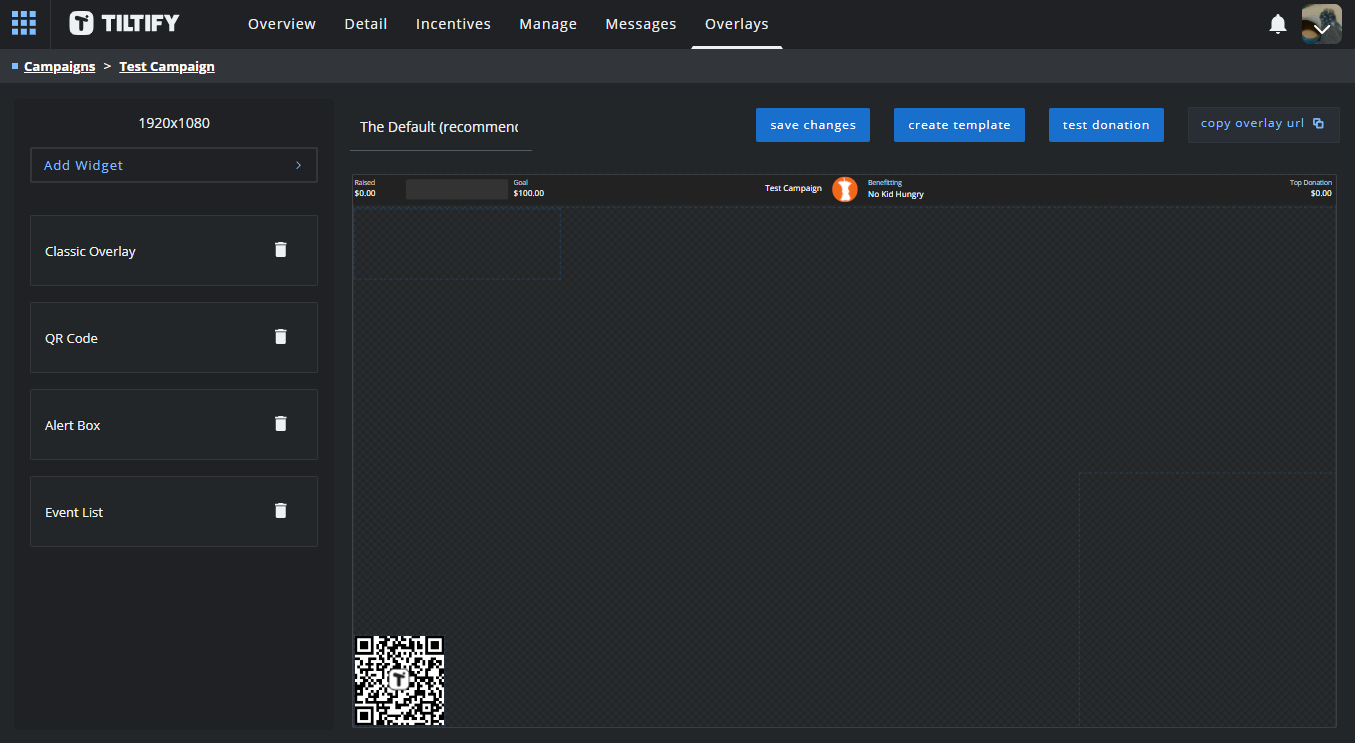
From the campaign page, click “Overlays” on the top bar then “Create new overlay.” You’ve got two options from here: “A Blank Slate” or “The Default.”

We recommend exploring The Default overlay first to understand all the pieces that come together to give your stream a mini fundraising makeover. There’s your main overlay bar which houses your top donation, campaign, icon, and a goal bar, a QR code that takes donors right to the donation page, the events list to show recent donations, and an alert box, all of which are customizable down to the font, color and gif. If you like this overlay, you’re all done!
But maybe you want to really make it yours. Head on back to “Create new overlay” and get started on your blank slate. We can’t wait to see what you make.
Now that you have your beautiful overlay created, you can add it to your stream. Here’s Tiltify’s guide on how to pop it into OBS and XSplit. Once that’s good to go, you’re golden!
If you have any questions or don’t see something covered here that you’d like to learn about, check out Tiltify’s master support page. They have plenty of in-depth articles covering all their features with step-by-step pictures included.
Thank you for your support for No Kid Hungry. With your help, we'll reach our goal that all kids will have the meals they need. Happy fundraising!


